How to Set Up Cloudflare for WordPress

In today’s digital age, website security is critical. Setting up a Content Delivery Network (CDN) like Cloudflare is one way to protect your website. In this post, we will go over the advantages of using Cloudflare and how to set up Cloudflare for WordPress.


What is Cloudflare and How to Setup Cloudflare SSL on WordPress?

Cloudflare is a content delivery network (CDN) that optimizes web traffic. It is a free service with many benefits for the user and can help you with your web optimization needs.

Cloudflare is a free service that can help you improve your website’s security, speed, and performance. It can also help to protect your website from DDoS attacks and reduce server load. This guide will walk you through setting up Cloudflare for your WordPress website, step by step, whether you’re a beginner or an experienced webmaster.

How to Set Up Cloudflare for WordPress

Image: cloudflare.com

Cloudflare advantages

Cloudflare offers many benefits for WordPress users. Some of these include:

  • Offers security services for your WordPress site, such as Web Application Firewall (WAF), Distributed Denial of Service (DDoS) protection, and Domain Name System Security Extensions (DNSSEC).

  • Provides analytics and insights about your website’s performance. For example, it can tell you how much bandwidth you use on your site, the number of visitors, etc.

  • Protection from Online Threats: Cloudflare helps to protect your website from various online threats.
  • Faster Load Times: Cloudflare caches your website’s content, speeding up the load times of your site by caching.

  • Improved Performance: By proxying your records, Cloudflare hides your origin server’s IP address, improving the performance of your site.

  • By proxying your records, Cloudflare hides your origin server’s IP address and protects your site from DDoS attacks.


How to setup Cloudflare?

Cloudflare is very easy to set up, but there are some things you should know before you get started. 

This ultimate guide will show you how to set up Cloudflare on your website in less than 10 minutes.


Step 1 - Create your CloudFlare account (Skip this step if you already have an account)

Step 2 - Click "Add a site"

Step 3 - Add your site

Step 4 - Choose your plan

Step 5 - DNS Settings - Forward your current domain to Cloudflare servers

Copy and insert your assigned Cloudflare nameservers on your domain DNS (on the domain registrar dashboard)


Step 7 - Configure Cloudflare plugin

How to control it?

BONUS - Remove Site from Cloudflare

FAQ - Cloudflare

“Technically, there is no limit to the number of domains you can add to your account.”

Source: Cloudflare Support, 21 April 2018.


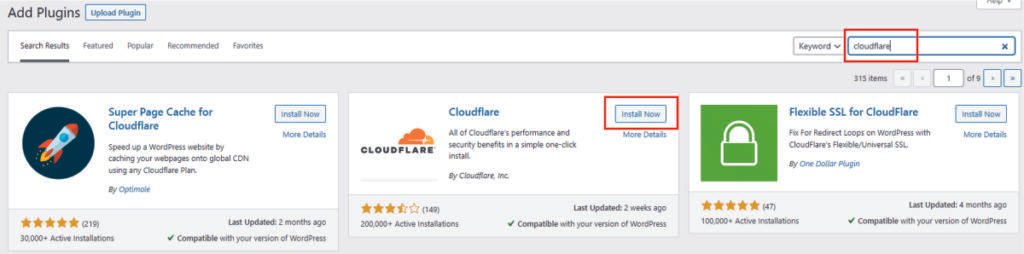
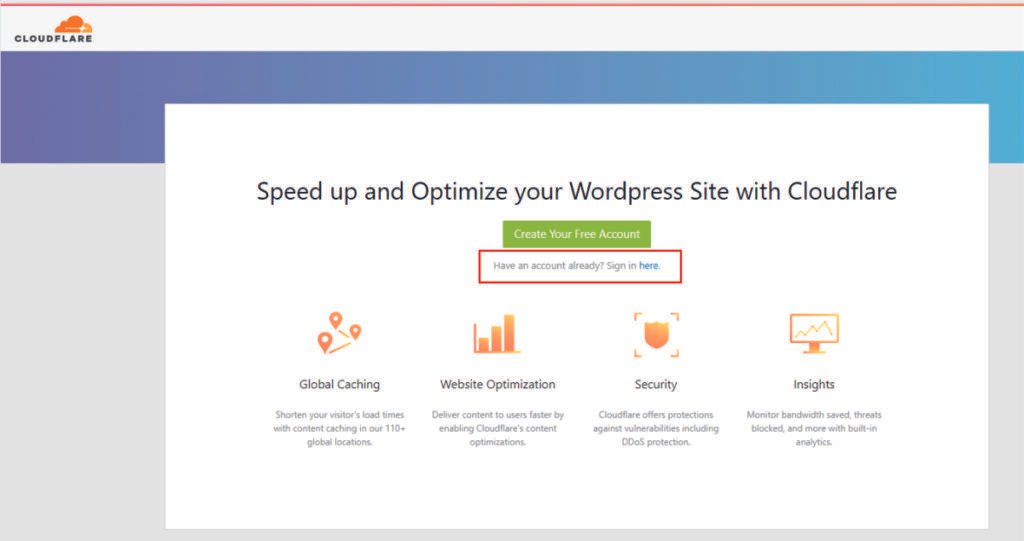
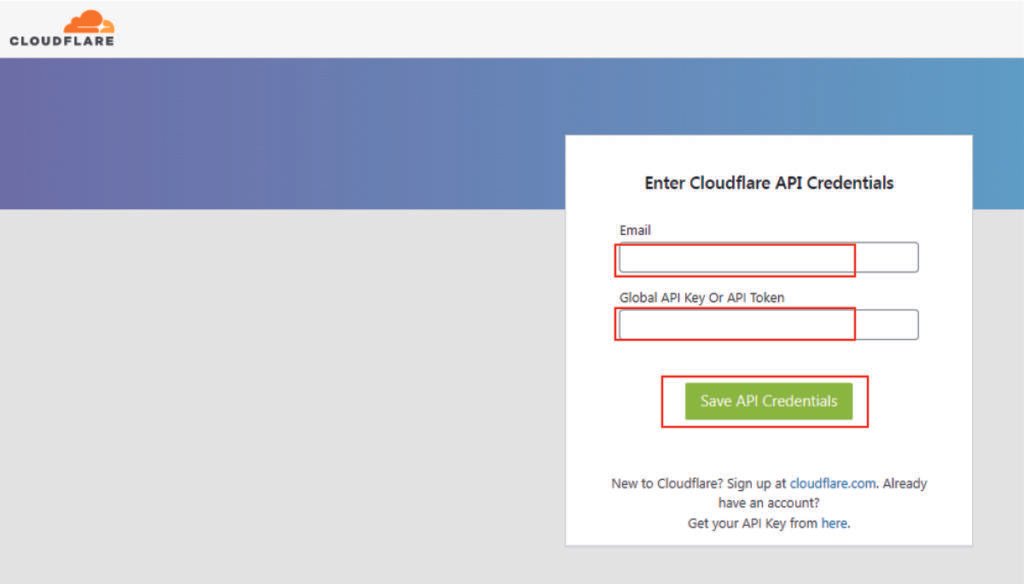
You can install Cloudflare by following the above steps.
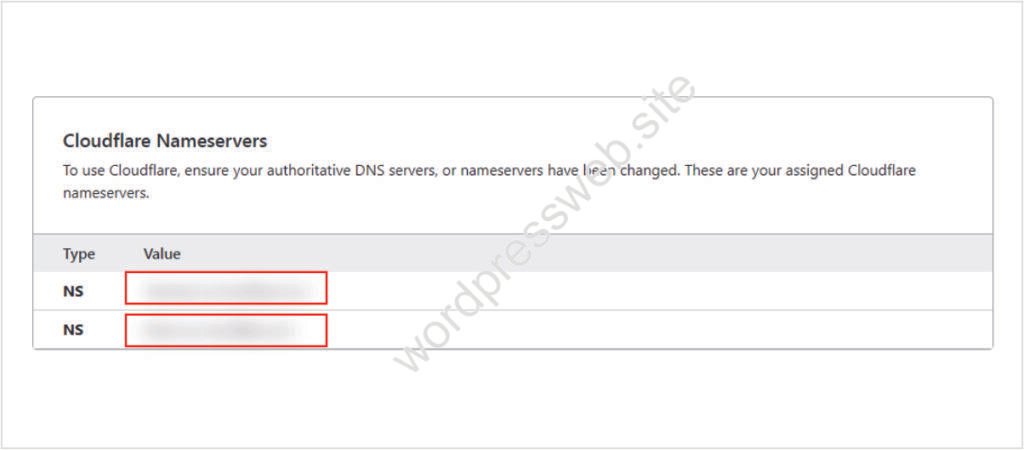
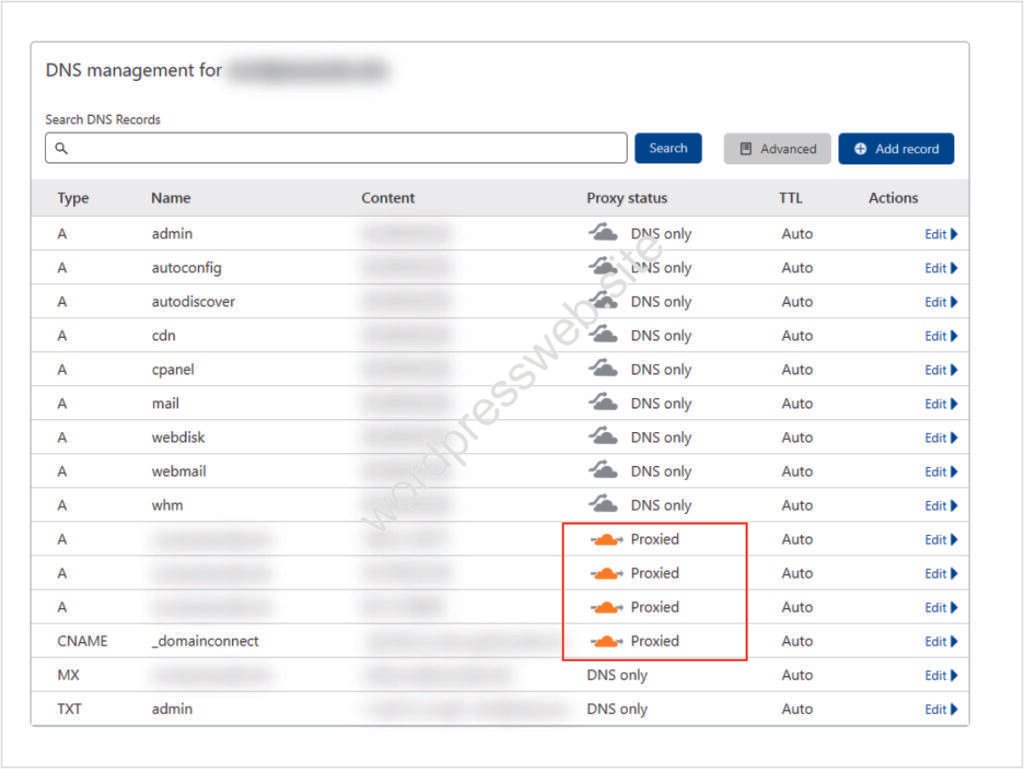
 

Pending domains

“Every zone onboarded onto Cloudflare will initially be in pending state until we can verify ownership. This means that DNS records are not proxied until your zone has been activated and any requests to your DNS records will return your origin server’s IP address.

For enhanced security, we recommend rolling your origin IP addresses at your hosting provider after your zone has been activated. This action prevents your origin IPs from being leaked during onboarding.”

Click here for more information.


In most cases, you should proxy your A, AAAA , and CNAME records. 


In conclusion, setting up Cloudflare for your WordPress website is a quick and easy process that provides numerous benefits. From improved security and performance, to faster load times and detailed analytics, Cloudflare is a powerful tool that can help you take your website to the next level. So why wait? Give Cloudflare a try today!


Subscribe to Our Newsletter

Stay up-to-date with WordPress news, tips, and exclusive offers by subscribing to our newsletter.

*By subscribing, you are signing up to receive our emails and can unsubscribe at any time.

More Posts

Related Posts